Building a Fast, Responsive Blog & Portfolio Site with Next.js, Ghost CMS, Vercel, and DigitalOcean
September 10, 2021 / 12 min read /
0 Likes •
0 Replies •
0 Mentions
(Note: My site is no longer built with this stack, though the tutorial should still work.)
I recently decided to migrate my website, and I wanted to move it from Webflow to something I had more control over. I was looking at Ghost CMS for content and SEO, but I also wanted to have complete control over the frontend code in case I wanted to add some custom components to my website later. I ultimately settled on a stack of:
- Next.js/Typescript Frontend hosted on Vercel
- Headless Ghost CMS hosted on DigitalOcean
I found this wonderful starter project, but configuring it ended up being a bit tricky. Here I will walk you through the steps so you can have a custom setup that is just like mine. This tutorial is a bit technical in that you will have to work with the command line a bit, but once it's set up you can go as deep as you want with customizing. Expect to spend a couple of hours on setup.
The total cost to host this solution is as low as $5/month. This cost comes from hosting GhostCMS on DigitalOcean. There is also the additional cost of a custom domain name, which is usually about $10/year for a .com domain. Compare that to using a managed GhostCMS, which starts at $9/month and rapidly gets more expensive from there as your traffic and needs scale.
The rough outline for the process is:
- Deploy GhostCMS to DigitalOcean
- Deploy Next.js frontend to Vercel
- Configure domain, then Ghost, then Vercel
Fair warning, this tutorial uses SSH and assumes you are on a Mac. Everything here is still possible on Windows, but the steps for setting up Ghost on DigitalOcean will take a bit more work and will look a bit different than what's here.
Setting up GhostCMS on DigitalOcean
We are using DigitalOcean to host our GhostCMS instance since DigitalOcean allows you to launch a Droplet (virtual machine) from the App Marketplace that takes almost all manual steps to install Ghost out of the equation.
DigitalOcean Account setup
Before launching the virtual machine, you will need to do a couple of things.
First is to sign up for a free account with DigitalOcean if you do not already have an account. If you use my referral link, you can get $100 in credit, good for 60 days.

Once you've signed up, the next step is to add an SSH key to your account. An SSH key is an access credential that will help keep your server secure and ensure you are the only one accessing it. If you do not have an SSH keypair already, follow the instructions to generate one here (Mac & Linux) or here (Windows) . After you have your keypair, follow these instructions to add the key to your DigitalOcean account.
Launching the GhostCMS droplet
Now that your account is configured, we will actually launch the GhostCMS droplet. Visit this link and click Create Ghost Droplet. This will take you to a configuration page.
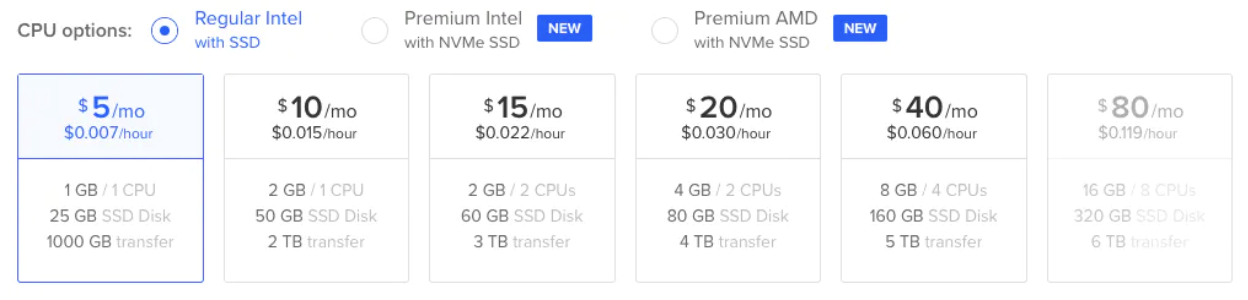
Very important: For CPU options, select Regular Intel with SSD and then choose the cheapest option. This option will be fine for the overwhelming majority of personal sites. As of writing this, it looks as follows, and I have the $5/mo option selected:
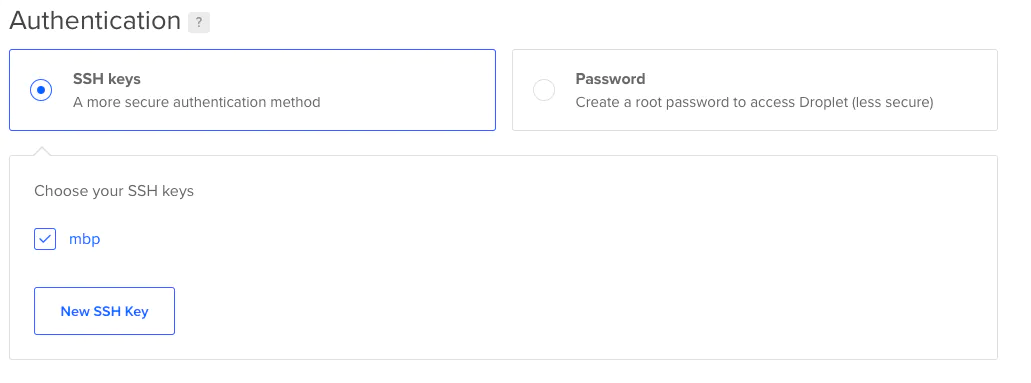
Scroll down to Authentication and make sure the SSH key you added to your account previously is selected:
Below authentication, in Finalize and Create, you can optionally give your droplet a more recognizable hostname. This is only to make it more clear what it is in your DO account.

In Add backups you can choose to enable backups for your server. This is optional, and will cost another 20% of the total droplet price to enable, but for the $5/mo droplet this is only an extra dollar so I choose to include it, bringing my total cost to $6/mo:

Finally, click Create Droplet. This will begin setting up the virtual machine. We will come back to configure it in a later step.
Creating and Deploying the Next.js Frontend
Creating the frontend repository
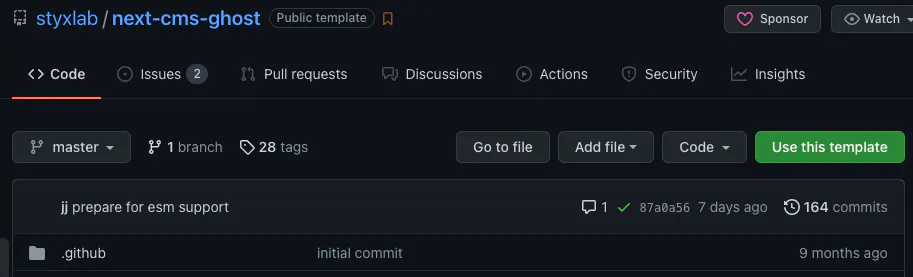
We will be using this awesome starter project that has most of what we need to wire our GhostCMS to a fast, responsive Next.js frontend.
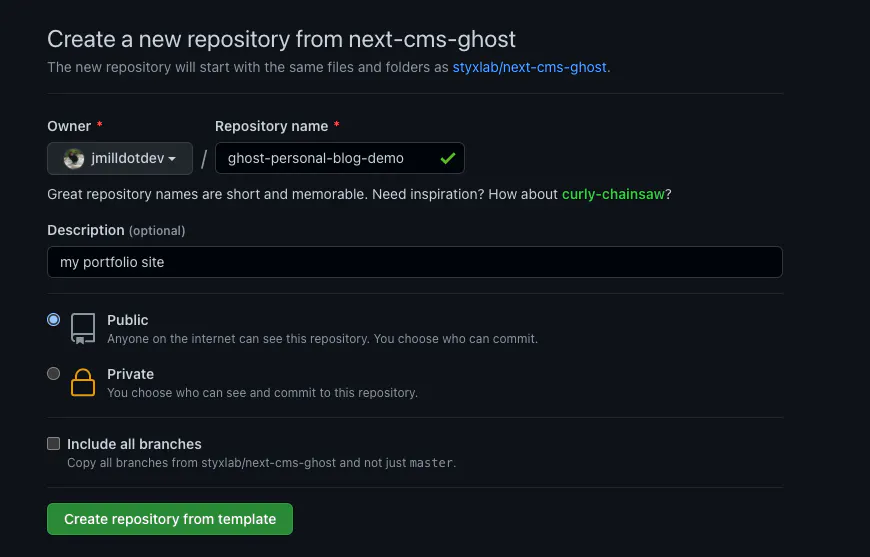
If you do not have a Github account, create one. When you are signed into your Github account, go to the starter project and click Use this Template in the upper right-hand corner
Give the new repository a name and description, then click Create repository from template
Deploying the frontend to Vercel
We will be using the awesome service Vercel to deploy our frontend for free!
Create an an account with Vercel and connect it to your Github account. Next go to the Vercel New Project page and import the git repository you created in the previous step. Make sure your Github integration is configured so that Vercel has access to this repository
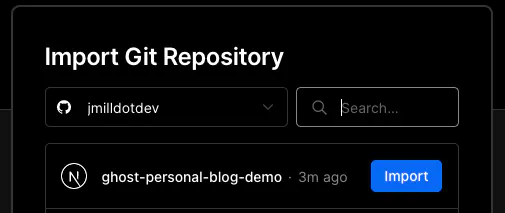
In the project configuration, click Skip on the first page (Create a Team), then leave all as default in the Configure Project step, unless you want to change the project name. Click Deploy.

This will begin the deployment process. In a couple of minutes you will be able to access the frontend at a Vercel-provided domain.
Configuring your Domain
The next step is to register and configure your personal domain. I use Namecheap for all of my domain name registration and management, but you may use a different provider so some of the steps may be a bit different depending on who is your domain name provider. The steps for configuration will be the same, you will be editing the DNS records. For Namecheap, I go to my account, select the domain (I am using numbershaman.com for this example), then go to Advanced DNS. Regardless of your provider, you should be able to find a screen that looks similar to this one:
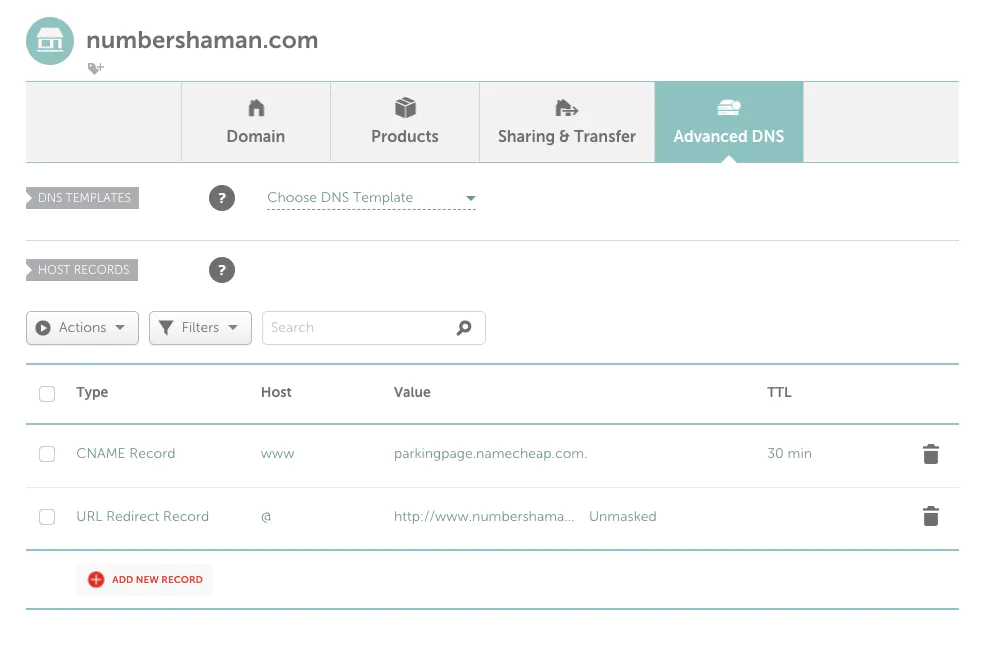
Clear out any existing records, then add the following
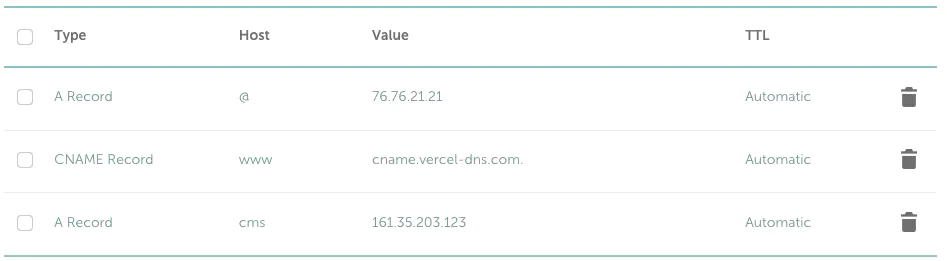
1Type: A Record2Host: @3Value: 76.76.21.21456Type: CNAME Record7Host: www8Value: cname.vercel-dns.com

This will configure your frontend deployed on Vercel to point to your domain.
Next, head back to DigitalOcean and grab your Ghost droplet's IP address. For me it looks as follows:

We will be deploying Ghost to a subdomain of the domain. So for instance, I deploy mine to the cms subdomain, and would access my Ghost management console at cms.numbershaman.com/ghost.
Add another record to your domain as follows:
1Type: A Record2Host: cms3Value: [DigitalOcean Droplet IP]
So now, I have a total of 3 DNS records:
Wait for a couple of minutes for the DNS records to propagate for the cms subdomain. You can check by entering your domain name here:
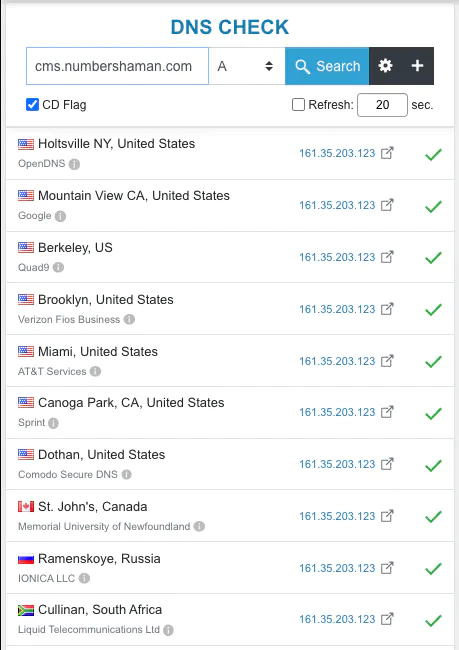
Configuring Domain in Vercel
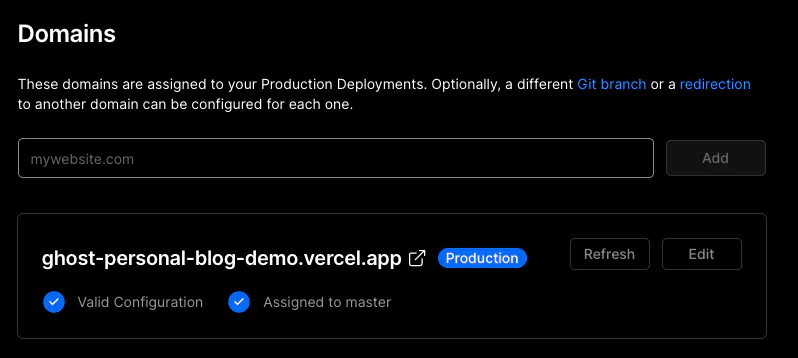
Next, we will add our configured domain name to Vercel. Go back to the Vercel Dashboard then choose your project, then click View Domains.
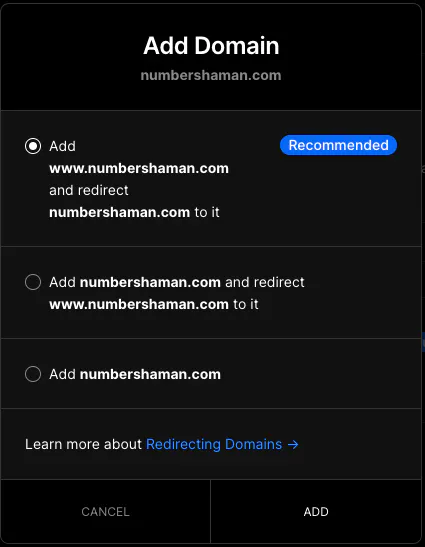
Here, add your domain to the site, and choose the first recommended option for redirecting:
After a few seconds, your domain settings page should look as follows:
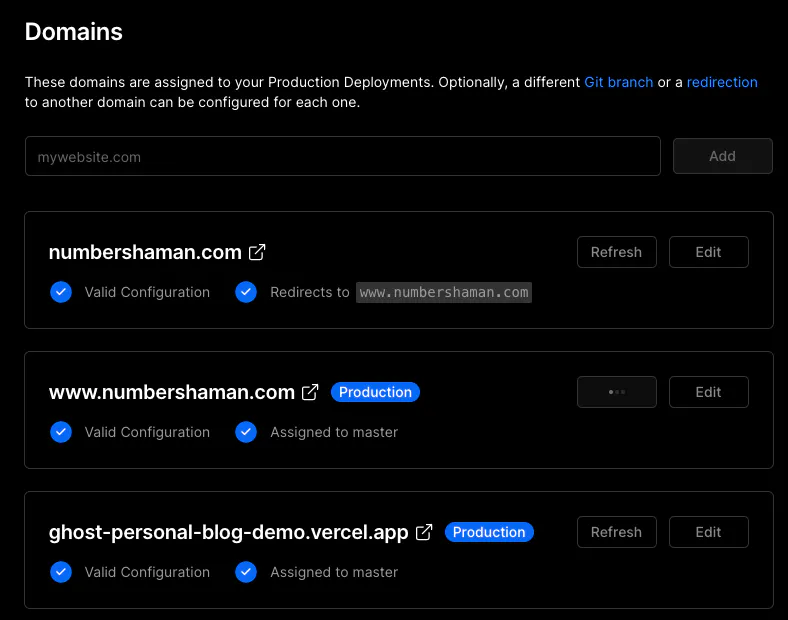
And you can navigate to your domain to see your site live!
Launching and Configuring GhostCMS
Launching Ghost CMS
Only a couple more steps to go now! Go back to DigitalOcean, grab your Ghost droplet's IP address. We will be using SSH to connect to it. Open a terminal and run the following
1ssh root@[Your Droplet IP]
It will prompt your for the password for your SSH key if all is correct. Once you run that, you should see this in your terminal:
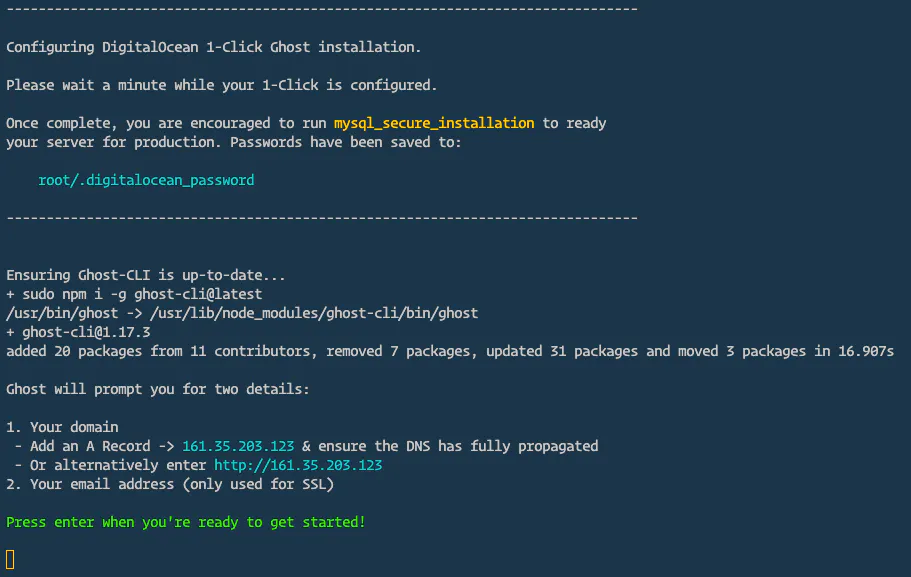
Press enter and wait for the prompts. You will have to enter two things. The first prompt will be for a blog URL, where you should enter cms.[yourdomain.com] or however you configured it. For me, it would be cms.numbershaman.com. It will also ask you for an email, which can be any personal email. If all goes well, you should see all green checkmarks in the setup script. and something like the following:
Finally, we have a couple more commands to run. In terminal, run the following:
1cat .digitalocean_password
This will print a root_mysql_pass you will need in a moment. Run:
1mysql_secure_installation
This will walk you through a prompt. Answer y, 1, then paste the root_mysql_pass value from your terminal window without the quotes. Then answer y to the rest of the prompts.
Configuring GhostCMS
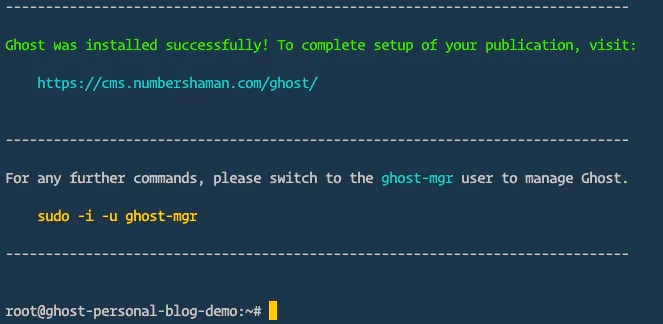
Still with me? Couple more things to do. Head to your blog URL from the terminal after the Ghost setup, in my case https://cms.numbershaman.com/ghost/
Click Create your account, pick a site title, name, and an email and password to login with. Skip inviting staff users.
Very important: click the gear in the lower left to go to the settings page, go to General, then scroll to the bottom and choose Make this site private. Click Save settings at the top.

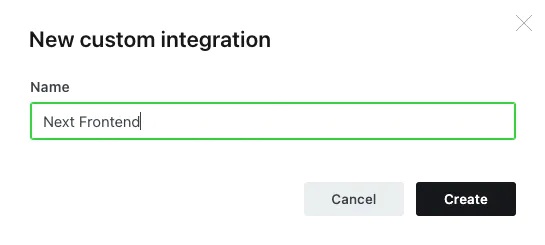
Next, click Integrations in the sidebar. Choose Add custom integration. Name it Next Frontend (or whatever you want), then click Create.
Copy the Content API key and API URL from this page and have them on hand for the final steps.
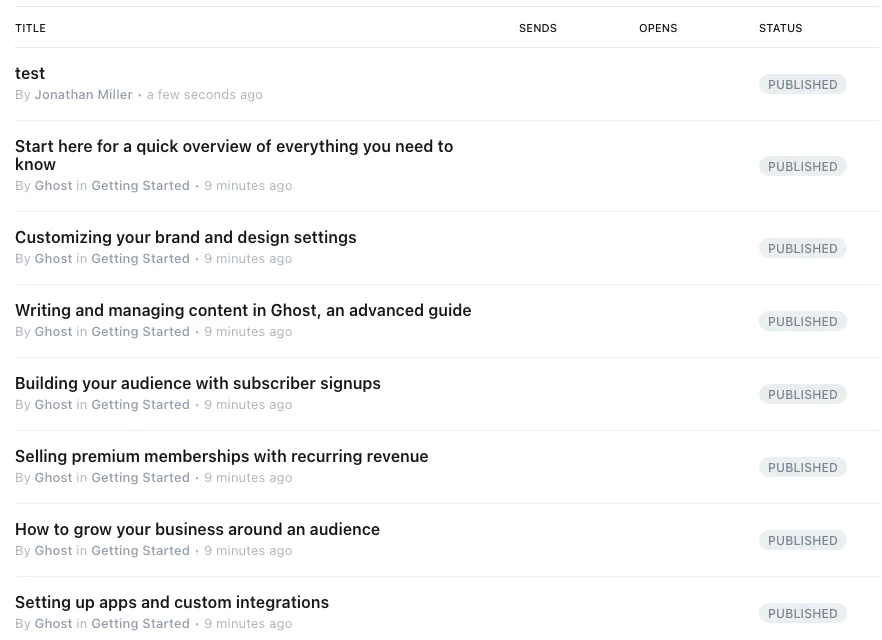
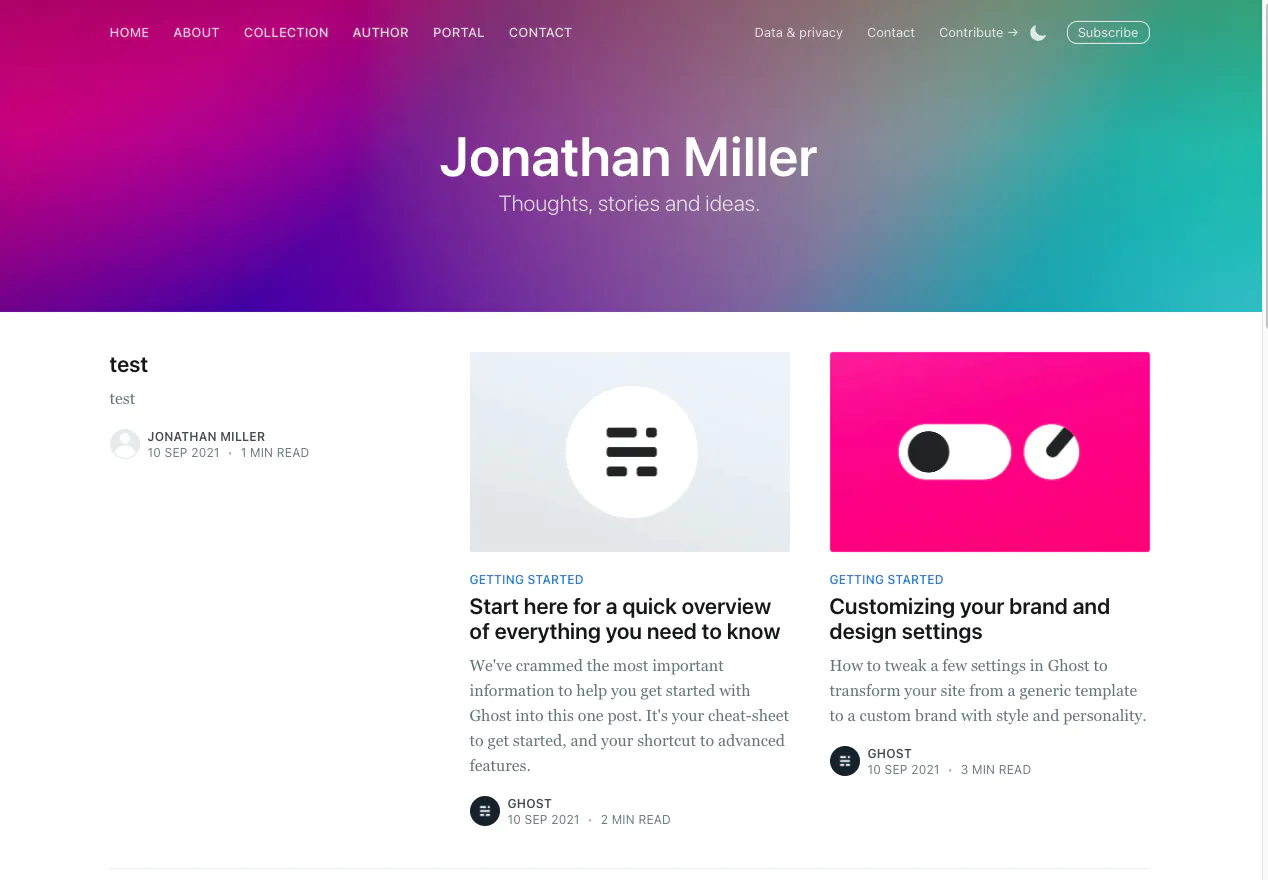
Optionally, you can create a test post under your Ghost user account to make sure the integration is working.
Connecting the Frontend to GhostCMS
Finally, head back to the Vercel Dashboard and select your project. Click Settings, then Environment Variables.

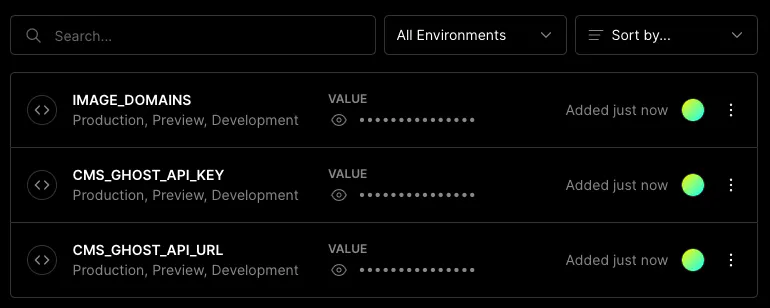
You will be creating 4 environment variables:
1NAME: CMS_GHOST_API_URL2VALUE: [Your API URL from above]345NAME: CMS_GHOST_API_KEY6VALUE: [Your Content API key from above]789NAME: IMAGE_DOMAINS10VALUE: [Your API URL from above, minus https://]111213NAME: SITE_URL14VALUE: [Your custom site domain]
So for example, I have
1CMS_GHOST_API_URL: https://cms.numbershaman.com2CMS_GHOST_API_KEY: 9fccdb0e4ea5b572e2e5b929423IMAGE_DOMAINS: cms.numbershaman.com4SITE_URL: https://numbershaman.com
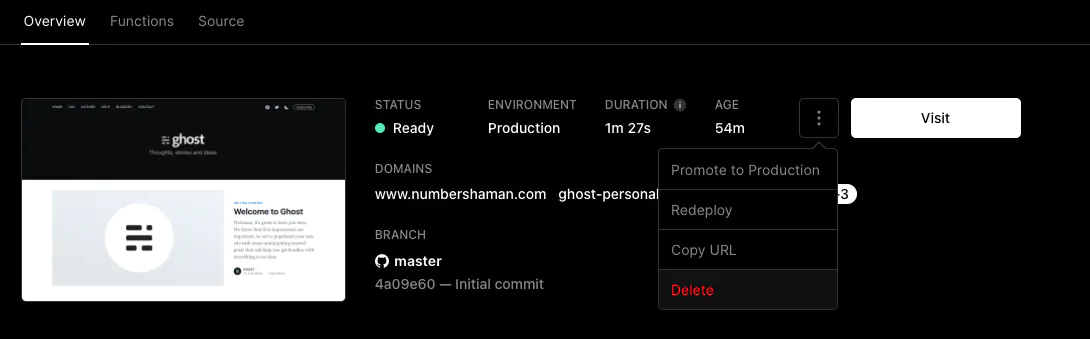
Finally, go back to the dashboard, go to Deployments, click the 3 dots button, then click Redeploy
If all goes well, when the redeploy finishes you should now be able to go to your domain and see your test post. We're finally done!! 🥳
Optional - Make and deploy a Frontend change
At this point your blog is set up and functional, but we did all this to be able to control our frontend's code, so why not make and push a local change? We are going to change our site so the default display is dark mode.
To start, go to your Github repository, grab the URL for the repository, and clone it to your local machine, then open it in your editor of choice.
The first step is to install the project dependencies. Run the following in the project root:
1yarn
Next, create a file .env.local in the root of the project, and add your environment Variables from above into the file, replacing the values with the values you used.
1CMS_GHOST_API_URL=https://cms.numbershaman.com2CMS_GHOST_API_KEY=9fccdb0e4ea5b572e2e5b929423IMAGE_DOMAINS=cms.numbershaman.com4SITE_URL=https://numbershaman.com
Now, run
1yarn dev
and open http://localhost:3000 in your browser and you should be able to see a local version of the site.
Now let's change the site to default to dark mode. Open appConfig.ts, go to line 11, and change 'light' to 'dark'. Now the site will default to dark mode when a new user visits.
Now run
1git add .2git commit -m "Change default mode to dark"3git push
This will push your changes to GitHub, and since you are pushing to the main branch it will trigger a redeploy of your site in Vercel. You can go to the Vercel Dashboard to confirm. Awesome!
Conclusion
It ends up being a bit of an involved process, but now you have a domain where you have complete control of the content, the hosting of the content, and the javascript code that powers your frontend. So now you can use the wonderful GhostCMS editor for writing and managing your blog's content and building simple pages, but you can also write new React components in your code editor to add to your sites pages.
Any time you want to add content to your site, if you add it through GhostCMS, you can trigger the content to go live by redeploying your site through the Vercel Dashboard, and if you add new content from a code editor, you can trigger the new content to go live by pushing the code to your main branch in the git repository.
Next steps would be to go into the GhostCMS management console, delete the Ghost user and default posts, then start configuring your site to host your awesome blog posts.
I hope everything here worked the first time and was helpful for you, if you have any troubles or questions feel free to get in touch on Twitter
Happy hacking!
Fetching Replies...
Do you have any questions, comments or simply wish to contact me privately? Don’t hesitate to shoot me a DM on Twitter.
Want more jmill in your life?
Get a monthly email from me about my ideas, as well as exclusive previews of upcoming articles and projects.
How I built this site using Next.js, GhostCMS, Vercel, and DigitalOcean, step by step.